Showing posts with label FingerPaints. Show all posts

Thursday, January 8, 2015

Layered Double-Stamping

Hello gorgeous! I'm baaaaaack!!!

So today, I decided to do a layered mani! I've been seeing a LOT of double- and triple-stamped manis and I've been wanting to try one. So then I got this Pueen stamping set and thought today's the day! So I started planning a mani and gathering my stuff, to find that I didn't own the plate that I had based the entire plan on... It was one that I ordered in a group buy on Facebook that hasn't been shipped just yet... /Headdesk...

SO I decided to keep the colors I had originally grabbed, and change the plan. I grabbed some saran wrap, and my new Pueen plates and decided to go to town. I picked one plate, Pueen 77, and used two of the patterns on it. 

I also used my new stamper for this, and OH MY GODS there is a GIANT difference between my original stamper (an old, old, OLD one that came with the original Salon Express) and the marshmallow stamper. Just SUCH a drastic difference, and I may not use the Salon Express one again... (I'll keep it around, though... Just in case...)

I also took pics for you guys to show how I made this mani: 

Step one (after laying down a white base): Saran Wrap mani. I used Sally Hansen's Kiss Me Here.
I topcoated after this with my Diamond Claws to prepare for stamping.

Step two: First layer of stamping, using Finger Paints Pop Art Purple

Step Three: Stamping with Sinful Colors Black on Black.
Step four: Cleanup and topcoat!

You can kinda see what patterns I used to stamp. 

I actually like how my right hand turned out more than my left ROFLMAO
As you can probably see, I'm rocking nubbies right now :'( My nails were completely destroyed by the move. Both pinkies broke past the smile line and have been very painful, as has a couple of hangnails that got a wee bit infected. Holding the steering wheel for 1.7k miles was definitely a challenge :( They're feeling better now though!!

So in other news: I'M OFFICIALLY ENROLLED FOR SCHOOL!!!!!!!!! I start on February 3rd, and HOOOOOLY MOLY am I excited!!! Also, funny story, the admissions agent that enrolled me was a former coworker! We had a pleasant time catching up :) It was suuuper embarrassing though,  because I hadn't done my nails just yet... So I showed up to the school with broken, chipped, messy nails, after telling Kelly that I'd been blogging for a while and all of that. SO EMBARRASSING.
I had also gone on a date with nasty broken nails and spent the evening very super self-conscious of my hands >.< But now they're all pretty again!!! Yaaay!

I still kinda feel like these are incomplete.. Got any suggestions on what I should add? Maybe some rhinestones or glitter? Comment down below! Please also don't forget to subscribe, there are now TWO options to do so, through bloglovin' and Google Friend Connect! Have a wonderful rest of the week!

Thursday, October 16, 2014

October Challenge: Week 3

Hello lovelies! This week you're getting TWO blog posts!! How awesome is that? Today's post is Week Three of the October Challenge! This week's theme is:
I realized after I did Week 1 that I'd already used spider webs, and felt like a dolt. But I've been wanting to do a mani like this for forever, so I just went with it. 

Turns out I had some bad karma or something going when I was doing this, because NOTHING was working with me. It was a very frustrating mani :( I had intended on having newspaper print going, the webs were supposed to be black glitter, and the spider on my thumbs were supposed to be stamped. But I couldn't find my spider stamping plate, my bundle monster binder for my plates broke (still usable), my rubbing alcohol is missing, and neither vodka nor water worked for the newspaper transfers, and the black glitter I have bleeds into the topcoat. Oh, and I tried to freehand a spider with no reference. My first attempt looked like a tick. ...You very nearly didn't get a Week 3. 

But I persevered and I survived, and I've already gotten a few comments on them!


They glow in the dark! But my camera can't capture it and it is impossible to find a black light smaller than 2' in this teeny tiny town.
Ooooh spoooooky misty green!
Holy crap I didn't see how many stringies I have :(
For this mani I laid down a layer or two of Rue Beaute's Mint, and then dabbed on China Glaze's I'm With The Lifeguard, Finger Paints' Silkscreen Green, Sally Hansen's Limestone, and LAC's Limelife using a makeup sponge and some foam I cut up from some kind of packaging. I then did a thick layer of Seche Vite, because I just KNEW I was gonna mess up. Holy moly am I soooo very glad for that forethought! This is when things went... downhill. I'll spare you the gory details. I freehanded the spiders and the webs using a thinned Sinful Colors' Black on Black and a medium-length striping brush. Previously my arch-nemesis, it has become my favorite brush. Topped with a final coat of seche and I went to bed.

I really wish the newspaper transfer had worked out, but I'm still pretty satisfied with this mani. And I know it's messy, but I am damn proud of my spiders (not pictured, but the one on my left hand is actually much smaller). 


And just a reminder of what's coming up next:


Thursday, July 24, 2014

Cool-Colored Grunge

I had a totally awesome idea for these nails. ...It did not go as planned. I am disappoint. 

BUT! These still turned out really awesome, so yay!

I'm really glad I've finally got a regular schedule at work, so I can keep a regular schedule with the blog! Even though I almost forgot tonight (oops)!

So I visited a look I liked a while back from Thanksgiving 2013, and gave it fresher colors :)


This is a very, very easy mani to do. Base coat, base color, and then scrape the polish from the brush until you get off as much polish as you can. Then put a minimum amount of pressure and glide the brush over your nail. Start in random places all over your nail. BAM! Awesomeness! I've already gotten compliments, and I JUST put these on last night :)

The colors that I used are Finger Paints' Inkblot Blue and First Edition and Sinful Colors' Irish Green and Dream On over two coats of Revlon's Spirit. I used a thin coat of Fairy Dust by China Glaze on my thumbs and ring fingers. For a top coat, I used L.A. Colors' Rapid Dry Top Coat. It was only a dollar, so I thought I'd try it. I... like it better than Seche Vite so far: less shrinkage and it smells better. We'll see how it goes in a few more manis.

What colors would you use for this? Please comment, share, and subscribe!

Friday, July 11, 2014

Gradient Tutorial

So today I'm gonna show you how to do a gradient, the way I'm most comfortable with. A lot of my friends see what I do and wanna know how I do it. So here goes!

What you'll need: At least two colors of nail polish, a damp makeup sponge, top and base coats, nail polish remover and q-tips for cleanup (or tape if you'd like. I don't recommend using petroleum jelly or lotions on the edges of the nails). 


Step one: Base coat. Paint the less opaque color on the nail. Get it as even as you can, but you don't have to go nuts and get it perfect. You'll be adding another couple of layers later. If you're using a more transparent nail polish (or any neon, really), use a white base color first. If both of the polishes are fairly transparent, just use a layer of white and sponge directly on the white.

Step two: Apply polish to the sponge.  Place the colors right next to each other, so they're touching. If they mix a little, that's fine. For this gradient, I used two shades by Finger Paints, Fifteen Minutes of Frame and Pop Art Purple.
Get them touching. Like that awkward Trojan commercial.

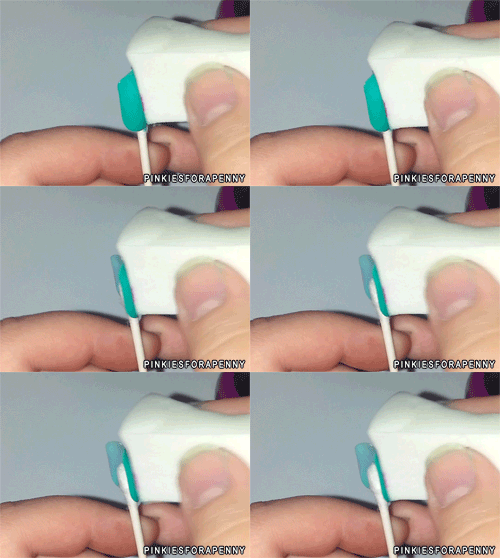
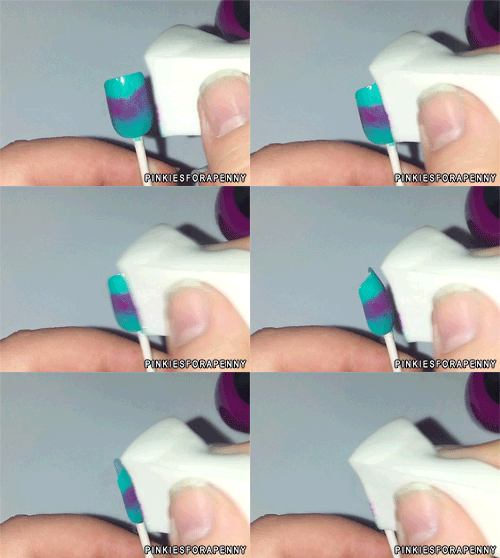
 Step three: dab the sponge onto the nail going back and forth across it. Go across and back a couple times, and then wait. Let it dry. Do it again.  Like so:

Back and forth.... Baaaaaaack and fooooorth...
Thanks to my buddie, Jaxo for the .gifs!
After a couple of coats, viola! A gradient!

I used this nail to practice sugar spun nails. I like it!
I hope this helps! If you have any questions, please leave them in the comments :)

Friday, March 14, 2014

Happy St. Paddy's Day!

YAY! CORNED BEEF AND CABBAGE FOR EVERYONE! 

This is one of my favorite holidays. I'm Irish, I love potatoes, my favorite food is corned beef. I might dye some white wine green. 

So I'm really excited to do St. Paddy's Day nails. You might get another post. 

To start off: these nails are not my favorite. The two greens I chose look REALLY different in the bottles, but when stamped they were REALLY close. Oddly, the darker color turned out lighter after sponging. 

I sponged Finger Paints Silkscreen Green and Sally Hansen's Tan Lime in a gradient. Apparently, Tan Lime is much more sheer than I was expecting. 
I used Sinful Colors Snow Me White as the base color. On the accent nail, I used striping tape and Tan Lime to create the stripes. 

Flash

Sunlight
After actually looking at the pics, I like them a little more than I did when they were on my nails.

Monday, December 30, 2013

Happy New Years'!!!!!

Another 12 months have passed since this time of year again! Yaaay!
And of course I have to have nails for the occasion :D
OH NO WHERE DID MY PINKIES GO?!

Fireworks!
And a toast to finish off the new year/welcome in the new one!

In the past three days I have taught three people how to successfully stamp using stamping plates. I'm pretty damn proud of that :) They had beautiful nails :)

To create this look I used Sinful Colors Black on Black, and Snow Me White, Fingerpaints Peacock Portrait, and OPI Nicole Heavenly Angel. 

Thank you guys for sticking around :) This year my goals are to start getting comments outta you guys, get some subscribers, and to finally sit down and work out a schedule. Do you have any goals geared around your hobbies?

Wednesday, August 28, 2013

Acid Wash Nails

Another one from Pinterest, sorry.
I followed this tutorial to get this look :)


I used four colors:
This was the closest I could get to the colors. The only one that's on is the 15 Minutes of Frame.
I used Rue Beaute! Mint, Finger Paints 15 Minutes of Frame, Finger Paints Inkblot Blue, and Sinful Colors Dream On.


I didn't like the way this one turned out- at first. But then it really grew on me :)
This manicure took about 4 hours to complete, because I had to wait for all of the layers to dry. Disregarding top and bottom coats, this took 8 coats of paint.
I will probably not attempt this one again for a while.

Sunday, August 18, 2013

Fun with Holos

Sorry it's been so long! I got a promotion at work that changed my hours (I'm now 3:30-Midnight), my babysitter quit with no notice, and I've got an almost-boyfriend that I spend most of my days off with, so I've been pretty busy! Please forgive me!

After getting the Born Pretty holo #7 and then getting the FingerPaints Peacock Portrait, I HAD to do a collaboration of the two! 

On my thumb is a gradient with #7, with a coat or two of Peacock Portrait. My ring finger is #7 with a couple coats of Peacock Portrait.

I used three coats of Peacock Portrait over black to get some opacity. The glitter is not terribly dense, as you can see on my ring finger.

Peacock Portrait is on every finger, while #7 is only on the thumb and ring finger.
Peacock Portrait is a chunky holo with teal hexagons. I'm in absolute love! My ONLY criticisms would be to make the glitter denser, with a faster-drying formula. It took FOREVER for one coat to dry, and I honestly could have used a couple more coats, but I got tired and frustrated, waiting for it to dry.

It was a very fun, very distracting mani a good way to get away from work lol